Quick Start
Watch this video for a quick overview of the HDR workflow:
Essential Setup
Enable HDR Plugin:
- Go to Edit → Plugins → SweejTech → HDR
- Restart the editor if needed
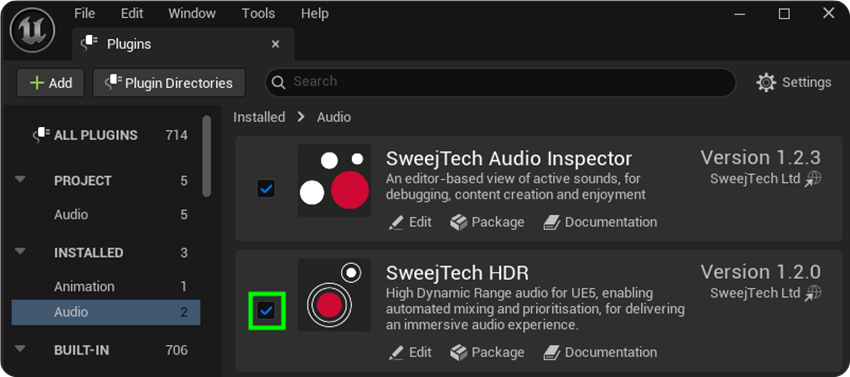
Enable HDR Plugin Configure Default Settings:
- Go to Edit → Project Settings → SweejTech → HDR
- Set default System Resting Loudness (recommended: 80)

System Resting Loudness - Configure Authoring Inclusion/Exclusion paths for your project structure
- Include the directories where the sounds you want to use HDR for are located
- Exclude things like VO waves, which will be thousands of assets you probably play through a cue or metasound
Enable HDR Source Data Override:
- Go to Edit → Project Settings → Platforms → Windows (or your target platform)
- Under Audio, enable HDR Source Data Override
- This allows HDR to store per-sound configuration data required for the authoring workflow
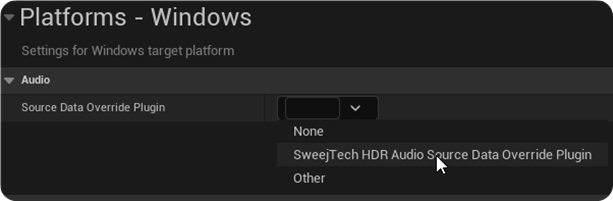
HDR Source Data Override Open HDR Authoring Window:
- Go to Window → SweejTech → HDR → HDR Authoring
- This is where you'll enable and configure HDR for individual sounds
Next Steps
Now that HDR is configured: