Authoring
Your game will need to support raytracing to access the most powerful and efficient part of the plugin but it does fall back to CPU and scale to less powerful platforms. This is automatically enabled when using High / Epic / Cinematic scalability settings. If scalability settings are medium or below you will need to enable one of the following r.Lumen.DiffuseIndirect.Allow = 0, r.Lumen.Reflections.Allow = 0.
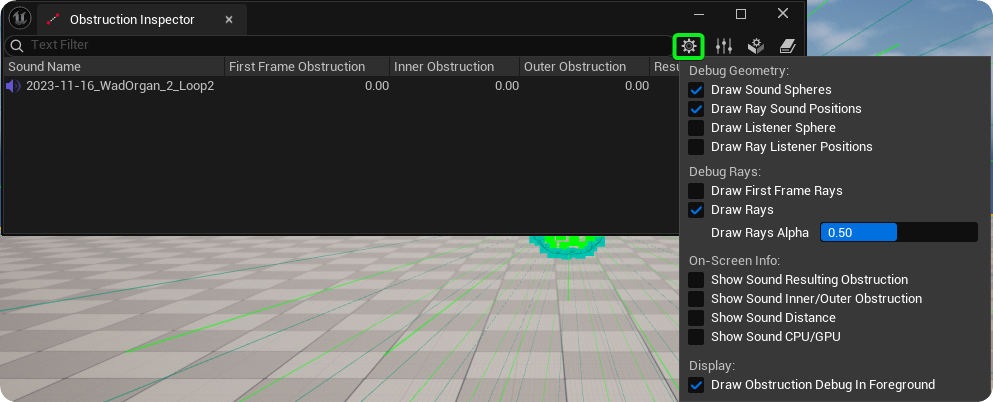
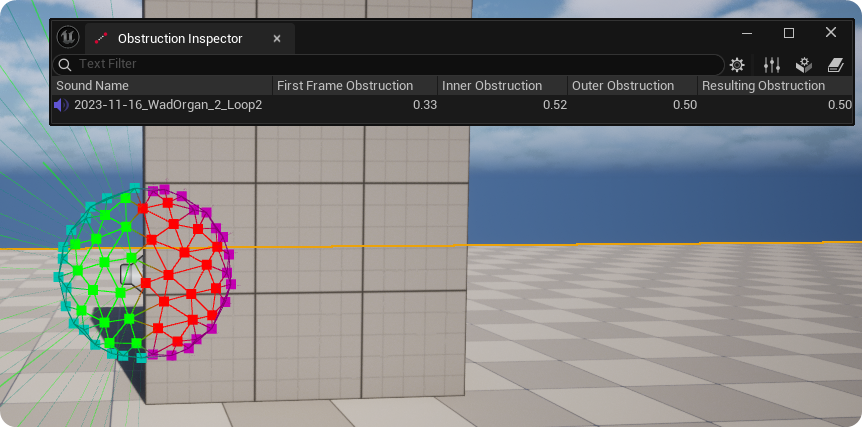
Begin by opening the Obstruction Inspector to select some debug options: Window → SweejTech → Propagation → Obstruction Inspector. A good start is to use the settings / gear icon to enable the options to display the Sound Spheres, Ray Sound Positions and Rays. For more details on the Obstruction Inspector see the Quick Reference page Quick Reference
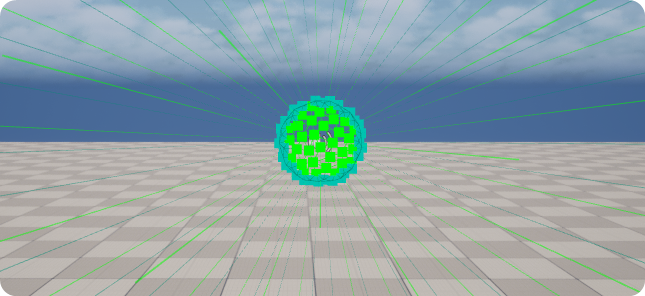
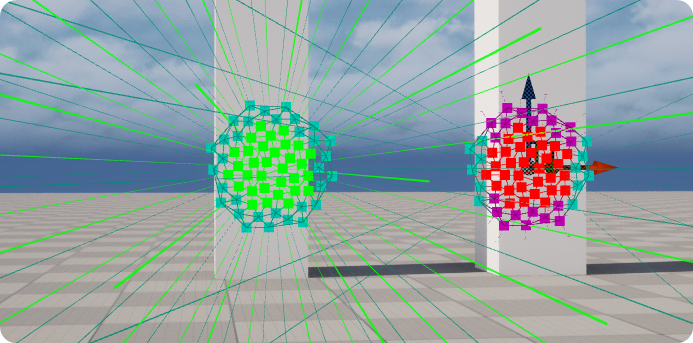
In the Viewport you will see these debug illustrations for your sound when you are within the sound's attenuation extents.
As discussed in the Concepts section Concepts the amount of filtering or attenuation applied to a sound source when it is obstructed by level geometry is a product of the sound source and listener radii, the distribution of positions on the spheres, and the scaling that is applied to the resulting Raw Obstruction value.
The Listener Radius is set by default to 100 units in the Project Settings menu. This can be adjusted in Project Settings → SweejTech → Propagation → Listener. The bigger the listener, the more geometry needed between the listener and sound source for it to be fully obstructed. The Source Radius and other sound specific settings are applied via the SweejTech Propagation Toolbar. (The Propagation Toolbar will be available in all sound assets once the plugin is installed -- see Quick Start for details).
SweejTech Propagation Settings for Sound Assets
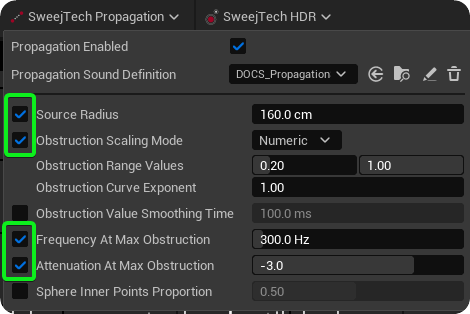
SweejTech Propagation is enabled, and settings are defined, on a sound asset level within Sound Waves, Sound Cues, or Metasounds via the SweejTech Propagation Toolbar.
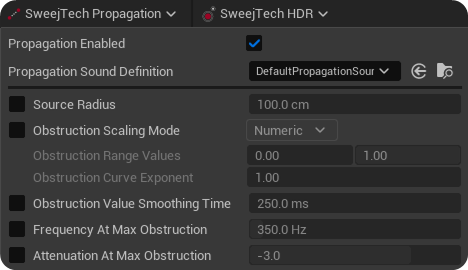
The default settings (based on the default Propagation Sound Definition asset) are a useful starting point and generally work well for the majority of sound sources. These will be overridden if an alternative Propagation Sound Definition asset is assigned (see below) or the override boxes are checked. (For a quick reference information on what these values are see the Quick Reference page.)
To understand the Propagation settings and their effects pick a sound within your game level and check the Propagation Enabled option within the SweejTech Propagation Toolbar.
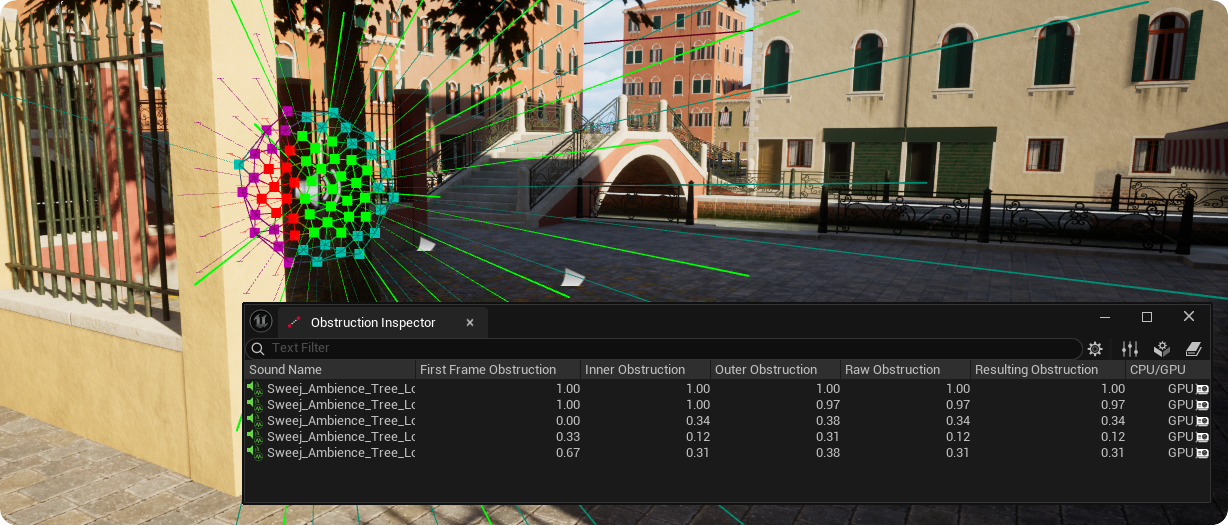
Now when obstructed by a mesh or other geometry within your scene you can see and hear the effects of the obstruction system on the sound. The Inner Ray Sound Positions are shown in Green when unobstructed and Red when Obstructed. The Outer Ray Sound Positions are shown in Teal when unobstructed and Purple when Obstructed. (For further details see the Concepts page.)
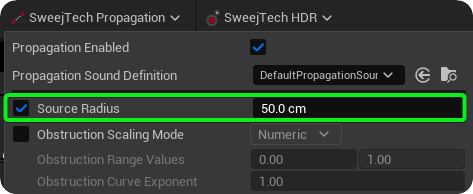
Experiment first by overriding the Source Radius of your sound in the SweejTech Propagation Toolbar by checking the box to locally override the default Propagation Sound Definition.
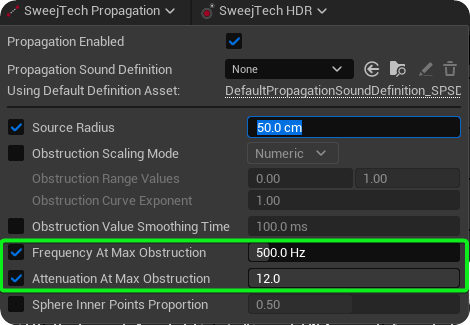
Obstruction effects: Frequency, Attenuation & Scaling:
The Frequency at Max Obstruction is the filter frequency applied when the sound is fully obstructed, and Attenuation at Max Obstruction is the attenuation applied to the sound when it is fully obstructed. Try overriding the default settings and adjusting the frequency and attenuation settings to hear the effect while watching the values change in the Obstruction Inspector.
By default the relationship between the Raw Obstruction values derived from the Ray Trace System and the Resulting Obstruction values that are used to determine the frequency and attenuation responses is linear.
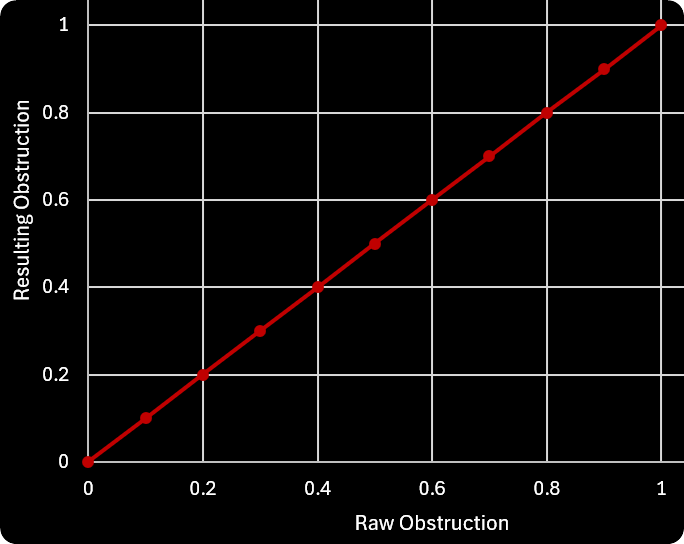
However, if you have sounds that you know are frequently going to be slightly obstructed, but you don't want them to always to be slightly filtered, you can map the 0.0 -- 1.0 Raw Obstruction values across a different range using the Obstruction Range Values. For example Obstruction Range values of 0.3 -- 1.0 would result in the attenuation and filter only being applied when the Raw Obstruction value > 0.3.

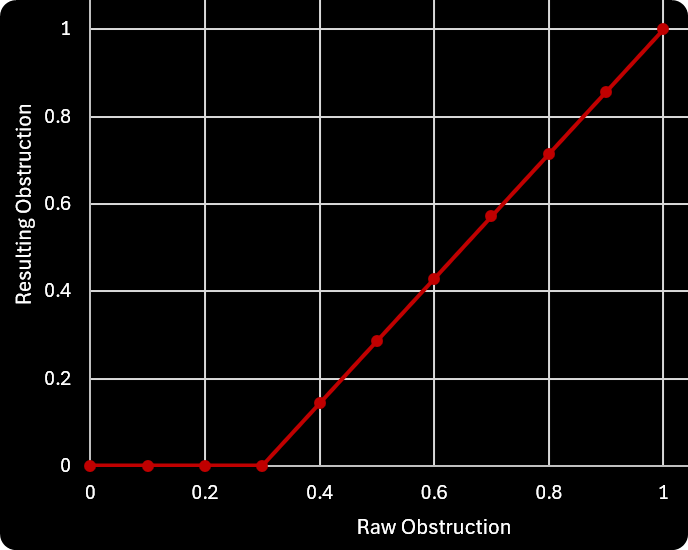
Again try this, listen to the results and observe the Resulting Obstruction values in the Obstruction Inspector.

If you wanted the same sound to become quickly obstructed, for example to reach maximum obstruction when the Raw Obstruction is only 0.8 then you could also set the Max of the Obstruction Range to 0.8.

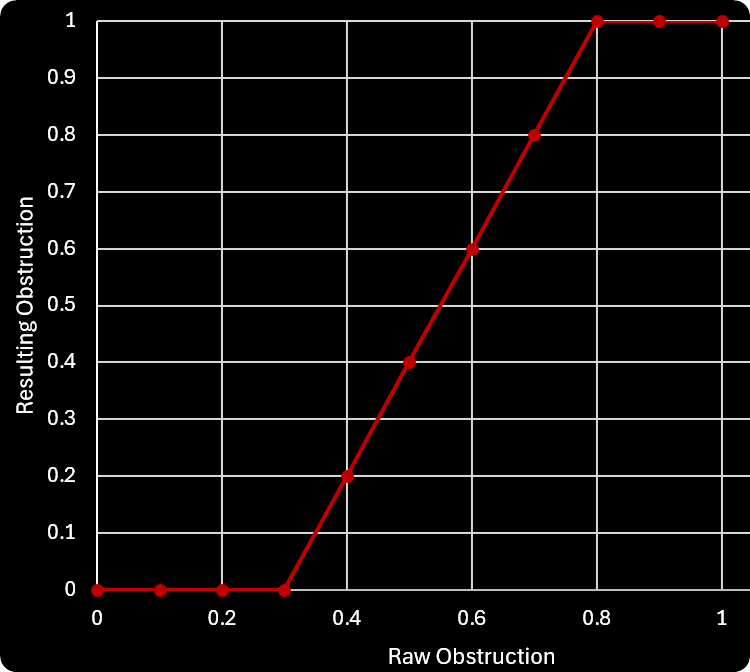

If the Numeric Obstruction Scaling Mode is not getting the desired results you can experiment with the Obstruction Curve Exponent, but perhaps a more bespoke and readable solution is to switch the Obstruction Scaling Mode to use Curves.
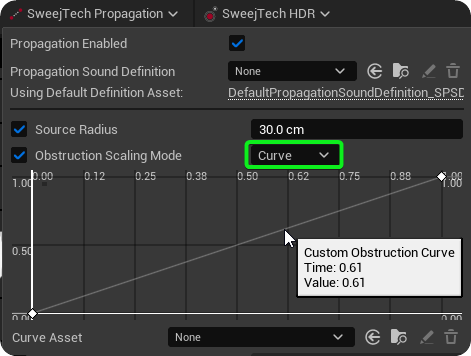
Once you are in Curve mode you can assign a Curve Asset or double click on the curve to open the Curve Editor. In the Curve Editor you can add key points by using Shift + Click and use the right click menu on those key points to set different types of interpolation between them.
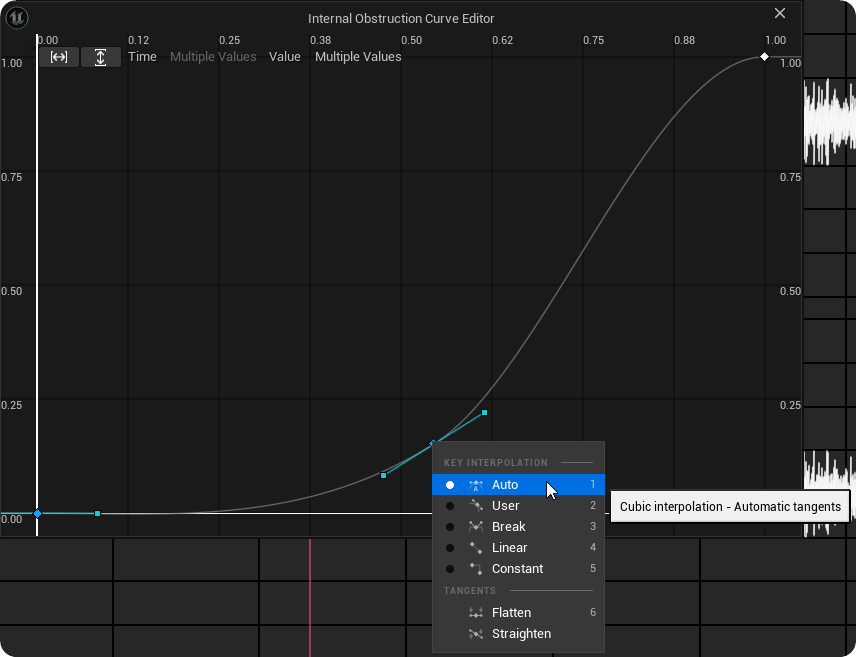
The resulting values from the curve can again be mapped across the Obstruction Range Values in the same way that the numeric ones are.
Obstruction Value Smoothing Time
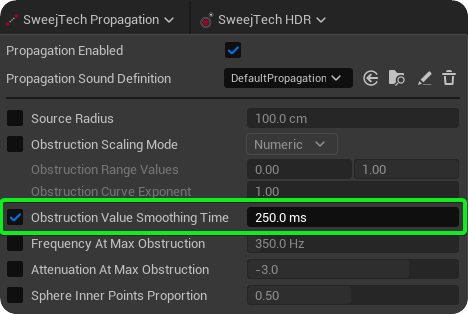
Once you are satisfied with the Listener Radius for your project, and the Source Radius, Frequency and Attenuation, and scaling of obstruction values per source you will want to consider how rapidly you want the obstruction filtering and attenuation to be applied. This is set per source via the Obstruction Value Smoothing Time in the SweejTech Propagation Toolbar. This set in milliseconds (default 250ms) and the obstruction value used for filters and attenuation will move smoothly over this amount of time to its current value in order to prevent hard cuts in the frequency response or amplitude.
Sweej Propagation Sound Definitions
Sweej Propagation Sound Definitions provide an efficient way to share common propagation settings across multiple sound assets.
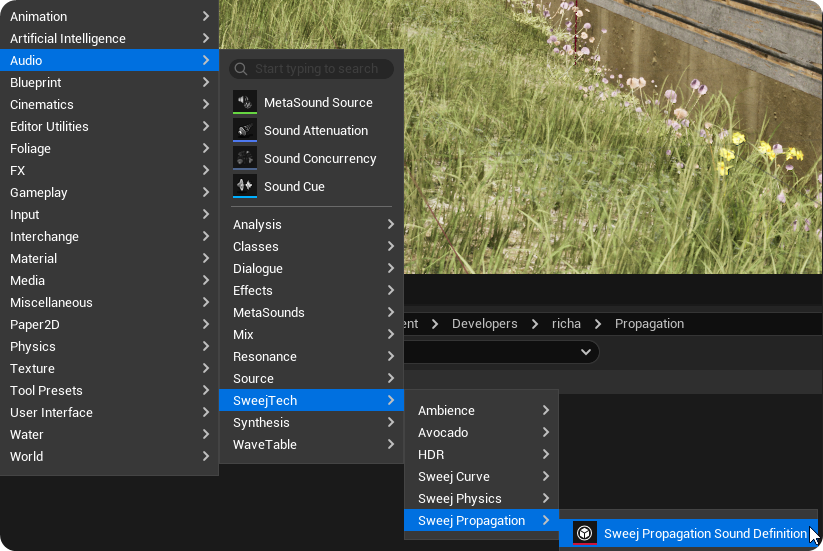
You create Sweej Propagation Sound Definitions in the Content Browser:
Add → Audio → SweejTech → Sweej Propagation → Sweej Propagation Sound Definition
These Sweej Propagation Sound Definitions can then be assigned to your sound assets in the Sweej Propagation Toolbar.
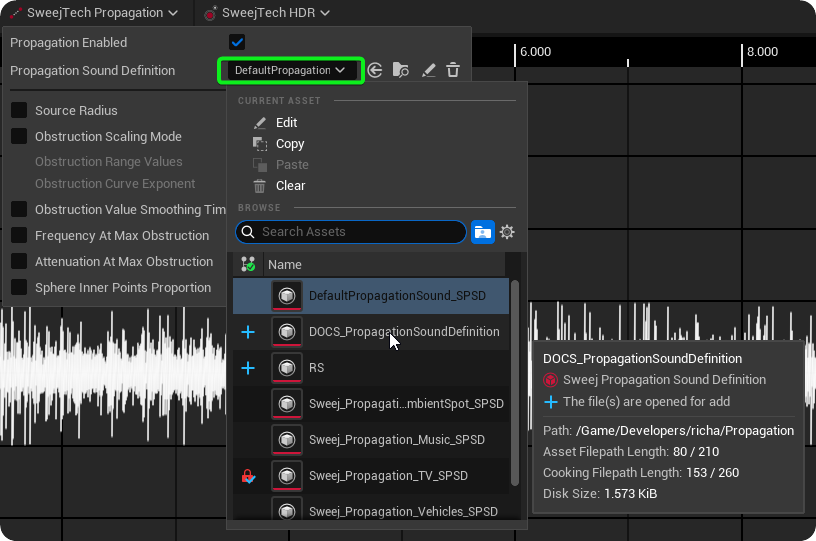
When required, values can then be overriden locally on a per asset basis using the check boxes.
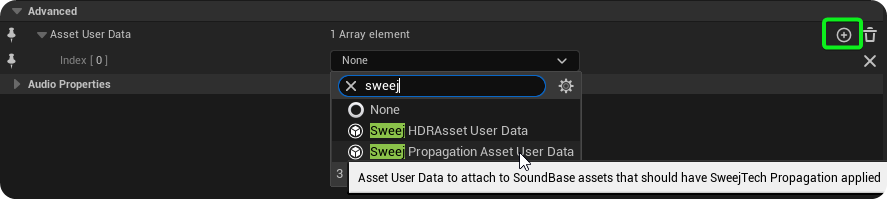
To enable and adjust multiple assets at once you can Right Click → Asset actions → Edit Selection in Property Matrix. In the Advanced drop-down menu in the right hand 'Pinned Columns' menu use the + icon to add Asset User Data (if not already present) and select Sweej Propagation Asset User Data.
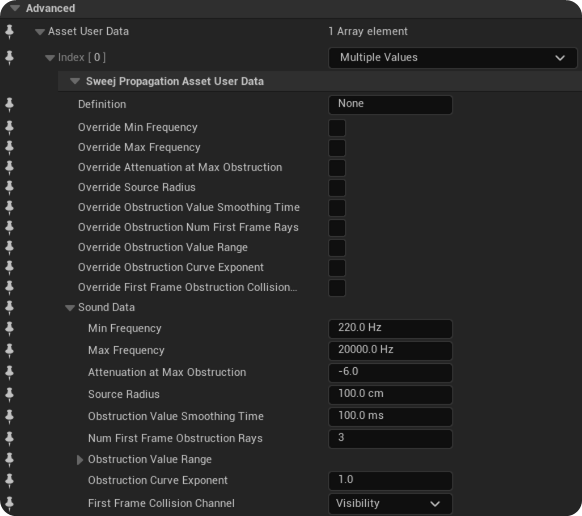
Then you can adjust settings on a bulk basis.
Ignore Static Meshes or on a per actor basis
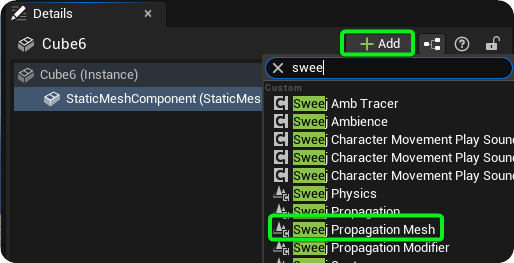
There may be instances where you want a specific type of static mesh, or specific actors using that mesh to be ignored for obstruction purposes. In order to implement this select the Static Mesh Actor you want to be ignored and add a Sweej Propagation Mesh Component.
Then navigate to the Static Mesh itself to edit it and add Sweej Propagation Mesh Asset User Data.
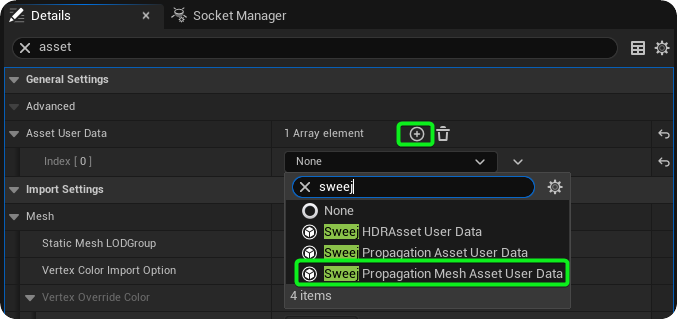
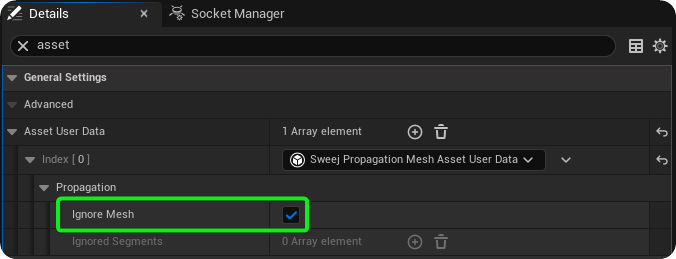
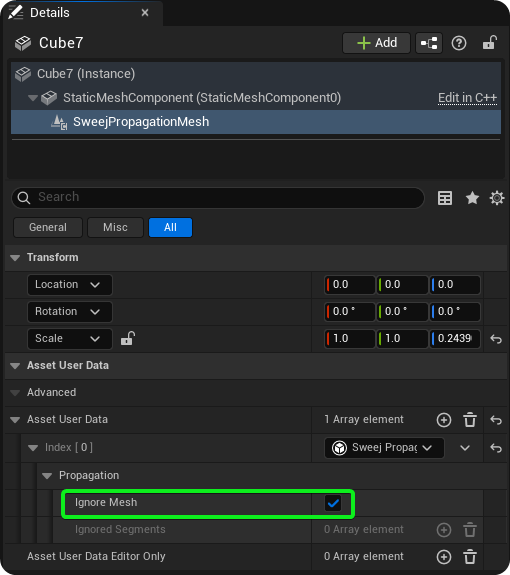
By default the Asset user data option to Ignore Mesh will be set to True, and so any actors using this static mesh will not obstruct the sound.
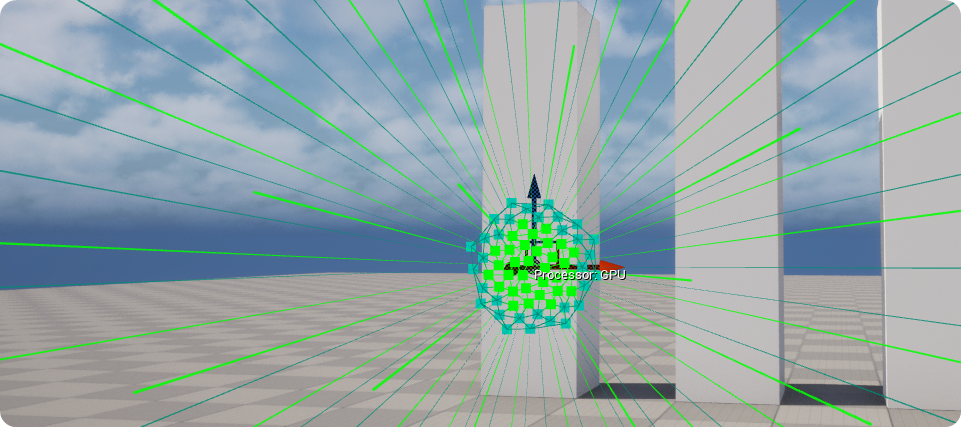
If you want to apply this to meshes on specific actors, rather than all instances of that mesh, then you can add a SweejPropagation Mesh Component to the actor as before, but then select this and add the Sweej Propagation Mesh Asset User Data to this specific instance.
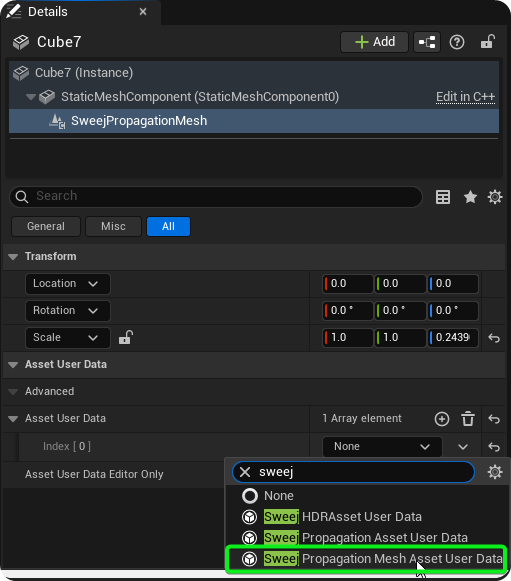
You can then set Ignore Mesh on a per actor basis.
Ignore specific geometry on a mesh
There will likely be instances where you want to ignore specific geometry on a mesh for obstruction purposes. For example, you may want the trunk / bark of this tree to obstruct sounds, but not the leaves.
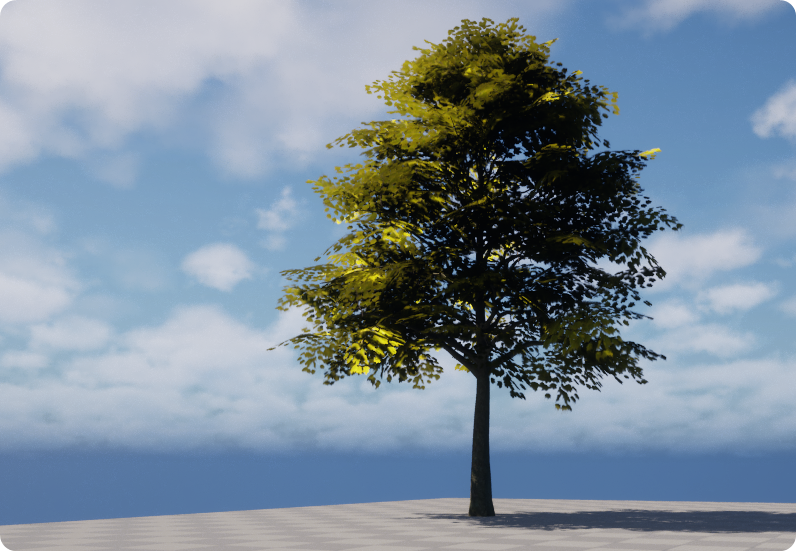
Start by adding a SweejPropagationMesh to the Static Mesh component
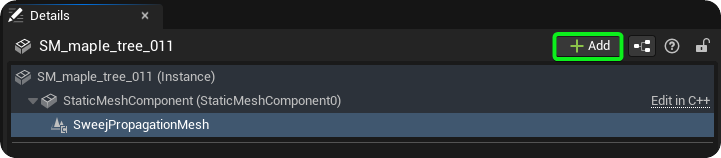
Then open the Static Mesh and add Sweej Propagation Mesh Asset User Data.
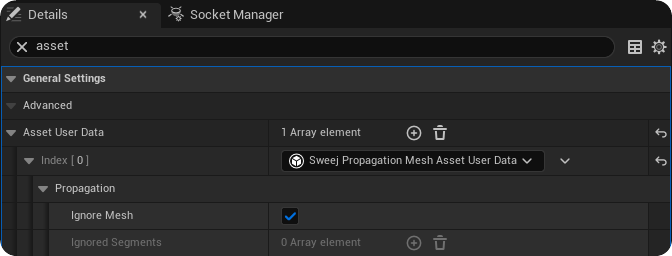
Untick the global Ignore Mesh option and the ability to ignore specific segments becomes available.
In order to determine the index for the segment you want to ignore change the View mode to Ray Tracing Debug / Picker.
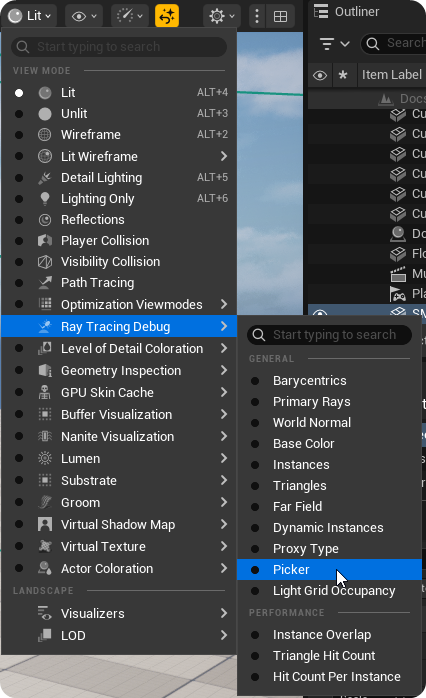
Type in the console command r.RayTracking.Visualize.PickerDomain 2, and you can hover over different segments and observe the [Hit] Segment index.
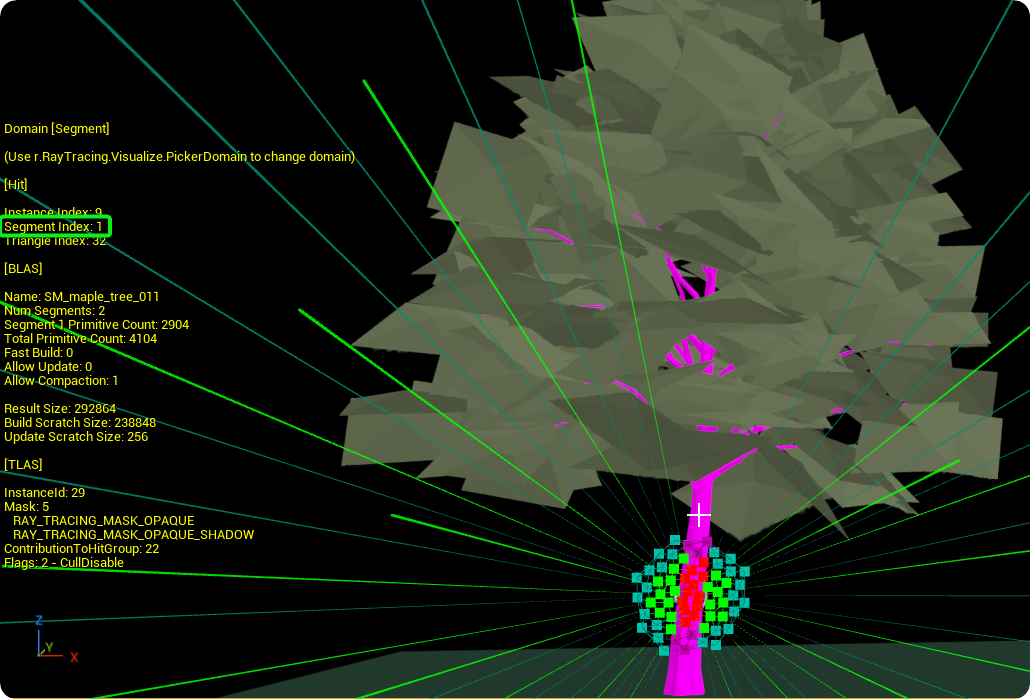
In this instance you can see that the Segment Index for the trunk / Bark is 1, and the Segment Index for the leaves is 0.
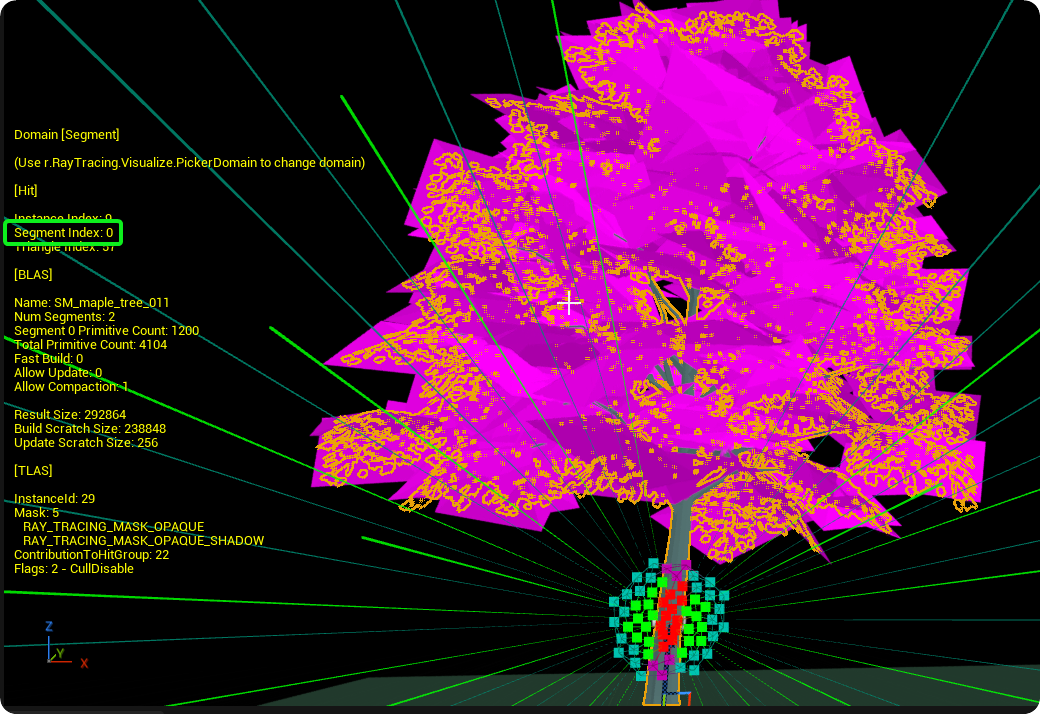
So if we use index 0 as the segment to be ignored in the Sweej Propagation Mesh Asset User Data of the Static Mesh then the leaves will no longer obstruct sounds.
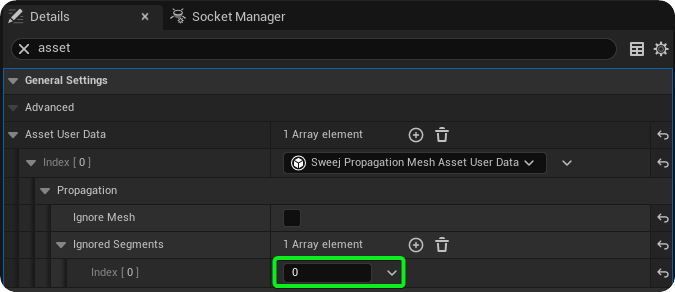
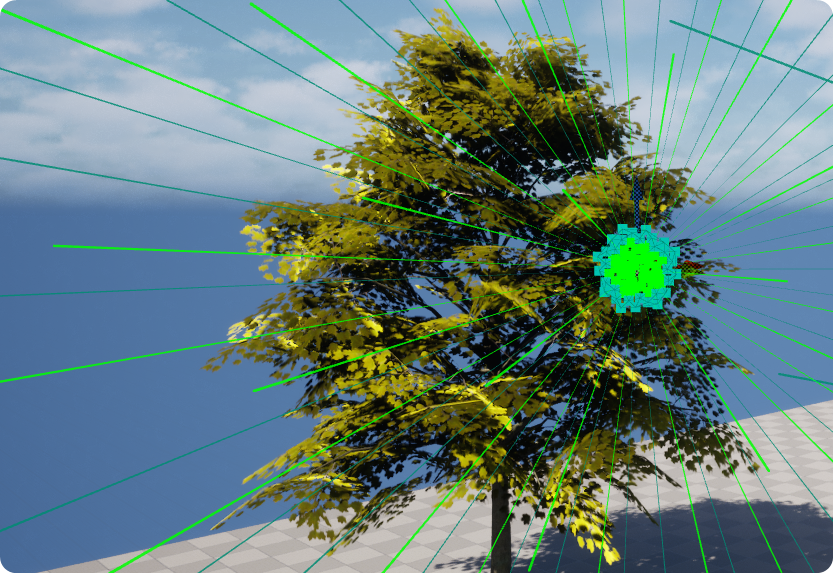
Note: Ignoring geometry segments is a GPU feature only. CPU falls back to ignoring the whole component. Indices follow the ray-tracing LOD's segment order and may change if the mesh is re-imported or its sections change.
Override Ignore Meshes on same actor
By default all sounds with Sweej Propagation enabled will ignore meshes that are on the same actor as them. This avoids actors obstructing their own sounds. However, it may be the case where you want some of the meshes to obstruct and not others. For example, in this scene we might want the exterior of the house to obstruct the sound from the pipes in the corner of the room, but not the armchair.
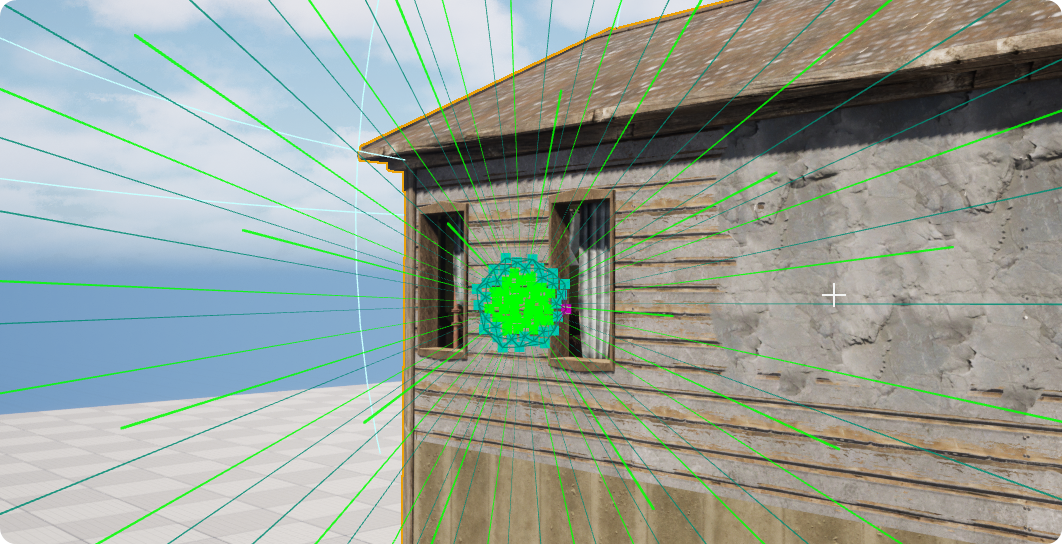
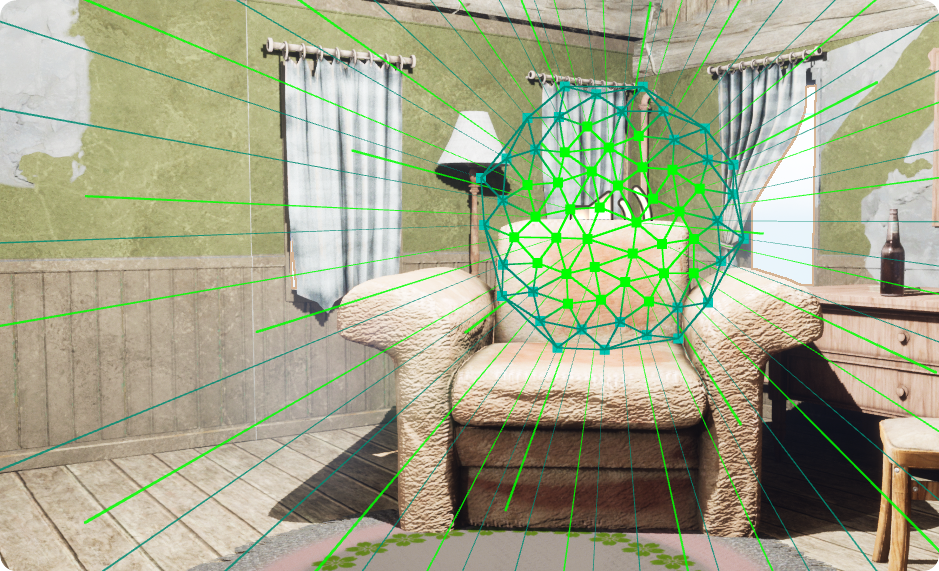
In order to override the default behaviour and determine specific meshes to ignore we can add a SweejPropagationModifier component.
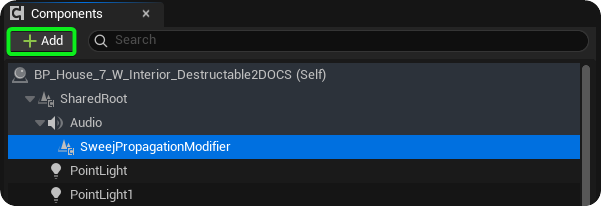
With the SweejPropagationModifier in place meshes belonging to the same actor will no longer be ignored. This means that the sound is now obstructed by the house mesh.
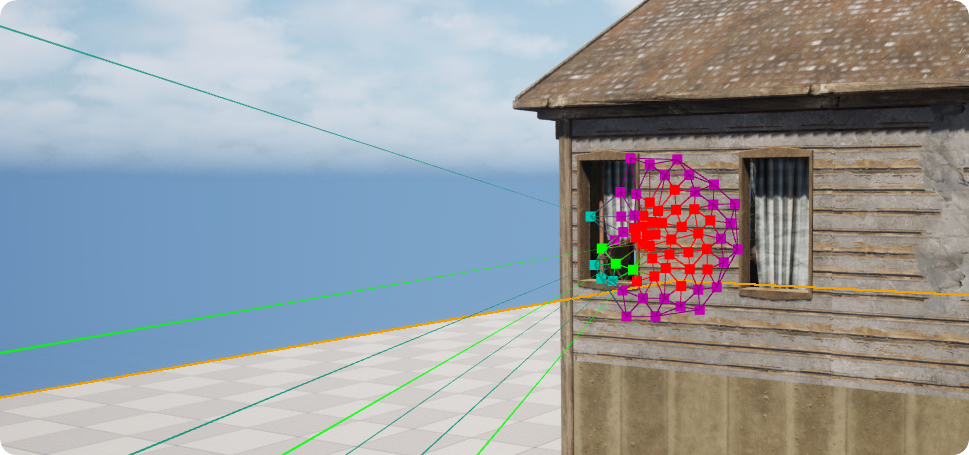
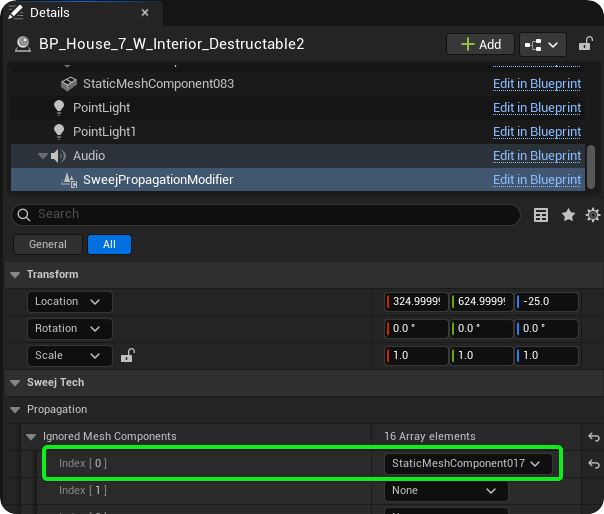
Although this reverses the default behaviour there will still likely be other meshes that we still want to ignore for obstruction purposes. To define these you can select the SweejPropagationModifier and add them to and index using the drop down menu for Ignored Mesh Components. For example, the armchair is StaticMeshComponent17 and adding this to an index within the Ignored Mesh Components list will result in this mesh now being ignored by the obstruction system.